“Replaced my old backup sump pump that was leaking into the sump pit with this one, install went smooth, fully assembled is nice to just connect and go. Took a couple of hours, ended up using a quiet-check valve on the discharge and an inline water hammer eliminator/check valve on the supply line. Shark fittings made this a delight to install. filled the sump pit with water, unplugged main sump pump, and let the backup get to the level for operation, ran nice and smooth, not too loud, cleared the pit well. Not as fast as the main pump, but then again, it IS a backup pump, I will be very very thankful to have this in the event of a power outage or if we're out of town during a heavy rainstorm. I now have a solid piece of mind about the basement staying dry. I would purchase this item again and recommend to any of my friends. item arrived on time and in good packaging.”
“Well-made and works as advertised, and at a good price. A challenge to install for the do-it-yourselfer- you'll need some plumbing expertise, soldering copper pipe etc., but would be the same for any product like this. I recommend it.”
“Had a great deal of trouble with my old Liberty sj10, but I just figured it was because it was an old pump (at least 10 years old), so I ordered another one when the old one would no longer hold water pressure. Well, the new one didn't work, but I'm fairly certain it is because we have extraordinarily strong water pressure. I used styrofoam and a zip tie to fashion a sort of life-jacket to increase the bouncy of the bobber, and seems to work just fine with this redneck engineering.”
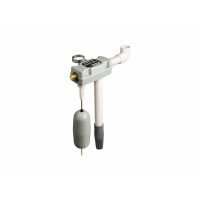
“Good pump, but inflexible in terms of float level, water intake levelI installed this pump in March 2013.Here are some install tips and comments.1. While the instructions said to have a separate drain line for just the pump, I thought that was unneccesary. Here is how I set mine up: With the primary sump pump on the bottom of the pit, run that output to a one-way check valve, then to a sanitary T-fitting that is upside down. From the horizontal end of the T-fitting, install a long sweep 90 degree elbow and run that up vertical. That needs to run up to two rubber 90 degree elbows that loop into the exhaust outlet of the Liberty pump. The other end of the upside down sanitary T-fitting gets run off to the storm sewer or outside discharge point. I chose to use the rubber elbows because I didn't want to commit to gluing up the Liberty pump outlet and realizing that I'd done it wrong (you do have to glue in a few inches of pipe to give the elbow something to clamp onto).The one-way check valve allows the Liberty pump to operate without pushing water back through the primary pump. The only negative to this setup is that you get a large volume of standing water above the one-way check valve that you have to drain in order to work on the system. You will likely get wet.2. I did install a Watts 009 reduced pressure backflow preventer. After that, I ran the 3/4" PEX line to a Sharkbite shutoff that is outside the pit, then to a T connector that is right at the edge of the pit. On one side of the T, I added a second shutoff, then ran a short pex line to the sump pit. This line is used to fill the pit in order to test that backup sump pump is working. On the other side of the T, I installed another Sharkbite shutoff, then a water hammer arrestor, and finally the Liberty pump itself.The beauty of this setup is that you no longer have to run a garden hose into the sump pit to test the backup system.Note: When testing the pump with this configuration (the sump pit filler and the pump are on the same line), you will find that your pump will not 'work' while you are filling the pit. You have to turn off the filler so that the pump has sufficient water pressure to activate (duh).3. I had initially wanted to install this unit inside the sump pit, in a tandem configuration, so I could still use my existing single-hole sump pit cover and have everything nicely below ground. Plus, if any of the water powered connections of the Liberty pump failed and started to leak, most of water shooting out would be contained within the sump pit itself, instead of (and ironically) flooding my finished basement.However, the Liberty pump is not adjustable in terms of the depth of the intake pipe, nor the depth of the float. It they had been, I could have done the install as I wanted. Additionally, the pump outlet of the Liberty pump protrudes horizontally more than I'd like, which makes it difficult to fit into the sump pit at all (any my pit is 18" at the top).This inability to have the Liberty backup pump lower in pit also becomes a factor when you want to test that the backup pump is working properly. My basement french drain lines are above the level of the primary pump, but below the level of the Liberty sump pump. This means that I have to add enough water to completely fill the entire french drain system before I can verify that the Liberty pump is working correctly. Water is fairly cheap, but this is annoying and wasteful.As a result, I had to install the Liberty pump on a 2x4 board above the sump pit, and construct a custom cover that would accommodate the new holes introduced by the Liberty backup pump. I chose to used pressure-treated wood to avoid mold issues.A more confident plumber/DIYer could have done the materials much cheaper than expensive Sharkbite fittings ($20 per 3/4" Sharkbite shutoff!) that I used, but I am willing to pay more for the Sharkbites because: 1) I suck at soldering, 2) if you make a mistake, you can easily fix the PEX/Sharkbite connection, and 3) Sharkbite fittings have never leaked on me.Overall I am very happy with my pump and its function. I've only taken away one star due to the Liberty pump unadjustability.”